
The last week in June was strawberry week around our house. We had been eating strawberries purchased at local farmers’ markets for the previous two weeks, a few quarts a week (and the few handfuls we’ve had from out own new plants), but I decided that I wanted to go into mass strawberry-saving mode. As has been mentioned in a comment to a previous post, eating locally could be a whole lot harder in the winter. So, to give us variety this winter, I’m working to put up some yummy things for those dark, cold days.
Some great friends of ours graciously volunteered their morning to come with me (and the kids) to Susie’s Garden Patch in Garden Prairie (just east of Belvidere) to pick strawberries. It was much-needed help as their youngest entertained Neva after she (Neva) tired of picking berries and the two older kids, along with my friend/their mother were able to pick about 22 quarts with me! In one hour I was able to pick about 6 quarts. Our friends only took four quarts home for themselves so I was left with a whopping 18 quarts to process. (yay!)
Freezing
I started by washing and sorting, drying and hulling. I then began freezing whole berries spread out on cookie sheets (the same way I did with our own fresh raspberries last year). After they were frozen I loaded them into freezer bags and placed them in our chest freezer (which is now full… I really need to decide on a larger one so I can get that ordered).
I had done a lot of reading on the proper ways to preserve strawberries and I realize that the technique I chose is not supposed to be the best… I just think it is the best for me. Freezing them in water or sugar syrup did not sound like it would work well for me and canning was definitely out (except as jam, keep reading). So, we’ll see how long they last and what quality we find when we thaw them this winter. I suspect that we will be so happy for strawberries that we won’t mind if they aren’t perfect.
I did use two additional techniques to preserve the strawberry harvest. I dehydrated enough to fill a half-gallon jar, and them some (after they were dried, of course), and I made jam.
Drying
Dehydrating was not difficult but it was more time-consuming than freezing the berries. I still had to wash, dry, and hull but I also needed to cut them (in half for the small ones and slices for the larger ones). Then I laid them out on the grates of our two food dehydrators and let them dry over night and then a bit in the morning. I had read that you should only use a dehydrator with a temperature control because otherwise they can get too hot for strawberries but, alas, neither of ours has that feature so I took my chances and it worked out fine. There were two racks that got a bit over-dried which is apparent in their taste but I’ll take what I can get.
 I did have to flip the jucier berries on some racks to encourage thorough drying and I reordered the racks in the stack a few times during the drying process. It took 10-12 hours to complete a batch. After letting the dried berries cool, I placed them in glass mason jars and set them in the dark pantry. I am now just a little nervous that there might be a berry that retained too much moisture that will mold and spoil all that effort (and my planned winter snacks!) but I check the jars every so often and they seem to be OK. I touched each berry and didn’t pull them from the dehydrator until they were firm and dry to the touch, but not crispy (except the few I accidentally over-dried).
Making Jam
I had made strawberry freezer jam on several occasions; it was the jam I grew up with my mom making. However, I had never experienced cooked and canned jam/jelly-making until last fall. Our good friends came over to help us gather the wild grapes that grow on some of our fences. Mind you, we needed a little help with the picking as the grapes were fairly abundant and Kai was born just two days later so my belly was pretty unwieldy! Later that day we went to their house with buckets of grapes and my father-in-law’s wine press.
There we met another couple and their son; friends from work who hailed from Italy. They had not made jelly before either so it was to be a fun learning experience for us all (followed by a yummy spaghetti supper made by one of the Italians!). The first order of business was for me to sew up a few jelly bags from cloth our friends had bought for that purpose. We then placed the grapes (stems, seeds, and all) into a bag and squashed the dickens out of it with the wine press. The juice ran a deeply regal purple and stained anything it touched, especially our hands. After pressing we made jelly the traditional way and tossed the skins, seeds, and stems (is it called “must” when you’re not making wine?) into the compost.
That jelly was delicious… so flavorful. I am usually not a fan of grape jelly but I have to say I really enjoy this one. Each couple ended up with about a dozen jars so we still have a few left. I’m allowing them this year (even though the sugar wasn’t local) because they’re pretty close to local, the grapes having been planted by birds in our yard!
Anyway, so now I was ready to make some jam on my own. I had been searching the Internet for proven recipes for jam made with honey instead of sugar. I don’t know what I would do without the Internet… I think it’s just a terrific tool! So, I found some recipes from Mother Earth News that used only honey to make jam. (see web links at right).

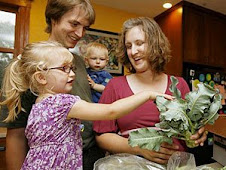
Neva wanted to help so one day during Kai’s afternoon nap we set about making our jam. She was my expert fruit masher (as was the neighbor boy who came by to play while we were working only to have Neva tell him she didn’t want to play until she finished making jam). It took seven cups of honey per about two quarts of strawberries so that makes it more expensive than traditional jam but it’s still cheaper than can be had in the store.
I did buy powered pectin, as strawberries are a low-pectin fruit. For anyone crying foul at my non-local pectin, I did look into making my own but that would require either citrus (definitely not local!) or apples (which won’t be ready to harvest for several more months).
The recipe says to boil the jam longer than the sugar recipes, which I did, but I wonder if it would have set without the additional minute because the jam I sampled (what little didn’t go into jars) was a little stiffer and more gelled than I might have liked. Also, the flavor of the honey does come through somewhat. I used a fairly mild honey but you can still taste it in the finished product – it’s not bad, it’s just different from the expected.
In the end I purchased an additional eight quarts of strawberries from a sweet family at the Edgebrook Farmers’ Market to supplement what remained from our picked berries after I had frozen and dried more than a dozen quarts. I made two batches of strawberry and one batch of strawberry-rhubarb jam (from our own rhubarb). We currently don’t eat much jam, just a little on pancakes or in desserts, but I suspect that come winter, when we are eating fresh bread most mornings for breakfast, we will appreciate a little sweet taste of summertime.
I hope to make more jams in coming weeks including raspberries (our bramble is just starting to produce!) and, perhaps, mulberries as we have several trees fruiting and each mulberry I pick and eat is one less sapling I will have to weed out of my garden!
Some great friends of ours graciously volunteered their morning to come with me (and the kids) to Susie’s Garden Patch in Garden Prairie (just east of Belvidere) to pick strawberries. It was much-needed help as their youngest entertained Neva after she (Neva) tired of picking berries and the two older kids, along with my friend/their mother were able to pick about 22 quarts with me! In one hour I was able to pick about 6 quarts. Our friends only took four quarts home for themselves so I was left with a whopping 18 quarts to process. (yay!)
Freezing
I started by washing and sorting, drying and hulling. I then began freezing whole berries spread out on cookie sheets (the same way I did with our own fresh raspberries last year). After they were frozen I loaded them into freezer bags and placed them in our chest freezer (which is now full… I really need to decide on a larger one so I can get that ordered).
I had done a lot of reading on the proper ways to preserve strawberries and I realize that the technique I chose is not supposed to be the best… I just think it is the best for me. Freezing them in water or sugar syrup did not sound like it would work well for me and canning was definitely out (except as jam, keep reading). So, we’ll see how long they last and what quality we find when we thaw them this winter. I suspect that we will be so happy for strawberries that we won’t mind if they aren’t perfect.
I did use two additional techniques to preserve the strawberry harvest. I dehydrated enough to fill a half-gallon jar, and them some (after they were dried, of course), and I made jam.
Drying
Dehydrating was not difficult but it was more time-consuming than freezing the berries. I still had to wash, dry, and hull but I also needed to cut them (in half for the small ones and slices for the larger ones). Then I laid them out on the grates of our two food dehydrators and let them dry over night and then a bit in the morning. I had read that you should only use a dehydrator with a temperature control because otherwise they can get too hot for strawberries but, alas, neither of ours has that feature so I took my chances and it worked out fine. There were two racks that got a bit over-dried which is apparent in their taste but I’ll take what I can get.
 I did have to flip the jucier berries on some racks to encourage thorough drying and I reordered the racks in the stack a few times during the drying process. It took 10-12 hours to complete a batch. After letting the dried berries cool, I placed them in glass mason jars and set them in the dark pantry. I am now just a little nervous that there might be a berry that retained too much moisture that will mold and spoil all that effort (and my planned winter snacks!) but I check the jars every so often and they seem to be OK. I touched each berry and didn’t pull them from the dehydrator until they were firm and dry to the touch, but not crispy (except the few I accidentally over-dried).
Making Jam
I had made strawberry freezer jam on several occasions; it was the jam I grew up with my mom making. However, I had never experienced cooked and canned jam/jelly-making until last fall. Our good friends came over to help us gather the wild grapes that grow on some of our fences. Mind you, we needed a little help with the picking as the grapes were fairly abundant and Kai was born just two days later so my belly was pretty unwieldy! Later that day we went to their house with buckets of grapes and my father-in-law’s wine press.
There we met another couple and their son; friends from work who hailed from Italy. They had not made jelly before either so it was to be a fun learning experience for us all (followed by a yummy spaghetti supper made by one of the Italians!). The first order of business was for me to sew up a few jelly bags from cloth our friends had bought for that purpose. We then placed the grapes (stems, seeds, and all) into a bag and squashed the dickens out of it with the wine press. The juice ran a deeply regal purple and stained anything it touched, especially our hands. After pressing we made jelly the traditional way and tossed the skins, seeds, and stems (is it called “must” when you’re not making wine?) into the compost.
That jelly was delicious… so flavorful. I am usually not a fan of grape jelly but I have to say I really enjoy this one. Each couple ended up with about a dozen jars so we still have a few left. I’m allowing them this year (even though the sugar wasn’t local) because they’re pretty close to local, the grapes having been planted by birds in our yard!
Anyway, so now I was ready to make some jam on my own. I had been searching the Internet for proven recipes for jam made with honey instead of sugar. I don’t know what I would do without the Internet… I think it’s just a terrific tool! So, I found some recipes from Mother Earth News that used only honey to make jam. (see web links at right).

Neva wanted to help so one day during Kai’s afternoon nap we set about making our jam. She was my expert fruit masher (as was the neighbor boy who came by to play while we were working only to have Neva tell him she didn’t want to play until she finished making jam).
 It took seven cups of honey per about two quarts of strawberries so that makes it more expensive than traditional jam but it’s still cheaper than can be had in the store.
I did buy powered pectin, as strawberries are a low-pectin fruit. For anyone crying foul at my non-local pectin, I did look into making my own but that would require either citrus (definitely not local!) or apples (which won’t be ready to harvest for several more months).
The recipe says to boil the jam longer than the sugar recipes, which I did, but I wonder if it would have set without the additional minute because the jam I sampled (what little didn’t go into jars) was a little stiffer and more gelled than I might have liked. Also, the flavor of the honey does come through somewhat. I used a fairly mild honey but you can still taste it in the finished product – it’s not bad, it’s just different from the expected.
In the end I purchased an additional eight quarts of strawberries from a sweet family at the Edgebrook Farmers’ Market to supplement what remained from our picked berries after I had frozen and dried more than a dozen quarts. I made two batches of strawberry and one batch of strawberry-rhubarb jam (from our own rhubarb). We currently don’t eat much jam, just a little on pancakes or in desserts, but I suspect that come winter, when we are eating fresh bread most mornings for breakfast, we will appreciate a little sweet taste of summertime.

I hope to make more jams in coming weeks including raspberries (our bramble is just starting to produce!) and, perhaps, mulberries as we have several trees fruiting and each mulberry I pick and eat is one less sapling I will have to weed out of my garden!
1 comment:
So glad you are getting help as that's a big job and yes you'll want to have a good lot to put up.
Post a Comment